Vinyl Wraps
- Care and maintenance tips for FlexiShield Car Wrap
- How to choose Hexis Vinyl Wraps to enhance the appearance of your car
- Guide to using KPMF Vinyl Wraps: creating a unique style
- Cleaning and maintenance tips for Orafol Vehicle Wraps
- VViViD Vinyl Wrap: a great choice for adjusting the style of your car
Guide to using KPMF Vinyl Wraps: creating a unique style
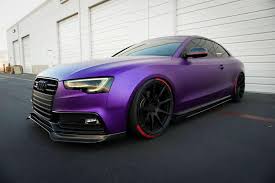
If you're looking to give your vehicle a fresh, eye-catching look, KPMF vinyl wraps are an excellent choice. Known for their durability, vibrant colors, and ease of application, these wraps offer a cost-effective way to transform your car without committing to a permanent paint job. Whether you're aiming for a sleek modern finish or a bold, standout design, KPMF Vinyl Wraps provide endless possibilities for customization. Here's a step-by-step guide to help you create a unique style using KPMF wraps.
Step 1: Choose Your Design
The first step in the process is deciding on the look you want to achieve. KPMF offers a wide range of finishes, including gloss, matte, satin, metallic, and even textured options like carbon fiber or brushed metal. Consider your personal style and the statement you want your vehicle to make. For a subtle upgrade, opt for a single-color wrap in a matte or satin finish. If you want something more dramatic, explore bold colors or gradient designs.
Step 2: Prepare Your Vehicle
Proper preparation is key to achieving a flawless application. Start by thoroughly washing your car to remove dirt, grease, and debris. Use a clay bar to eliminate any surface contaminants that could interfere with the wrap adhering smoothly. Once clean, dry the vehicle completely and inspect it for scratches or dents—imperfections can show through the vinyl wrap, so it's best to address them beforehand.
Step 3: Measure and Cut
Before applying the wrap, measure each section of your car to ensure you have enough material. KPMF vinyl wraps come in rolls that can be cut to size. Be sure to leave a little extra material around the edges for adjustments during installation.
Step 4: Apply the Wrap
Applying vinyl wrap requires patience and precision. Start with smaller sections, such as mirrors or door handles, before moving on to larger areas like the hood or roof. Use a squeegee to smooth out air bubbles and wrinkles as you go. KPMF wraps are designed with air-release technology, making it easier to achieve a seamless finish. A heat gun can also help stretch and mold the vinyl around curves and edges.
Step 5: Finishing Touches
Once the wrap is applied, trim any excess material using a sharp blade. Pay special attention to edges and corners to ensure a clean finish. Finally, use the heat gun to seal the wrap and improve its adhesion. Allow the wrap to set for 24-48 hours before washing or exposing it to harsh conditions.
Why Choose KPMF Vinyl Wraps?
KPMF has built a reputation for high-quality vinyl wraps that are both durable and visually stunning. Their products are resistant to fading and weathering, ensuring your vehicle maintains its new look for years to come. Additionally, their wide selection of colors and finishes allows you to create a truly personalized design.(Car Vinyl Wraps)
Final Thoughts
Using KPMF vinyl wraps is an excellent way to express your individuality while protecting your vehicle's original paintwork. With proper preparation and careful application, you can achieve professional-looking results that turn heads wherever you go. So go ahead—unleash your creativity and give your car the unique style it deserves!